I expect that many are aware of dialplan hooks as a means of adding your own custom Asterisk dialplan to the FreePBX call flow. If you’re not, then you can review this thread which has updated instructions for TangoPBX 17. One might think that’s the only way, or the best way of adding custom asterisk dialplan, but it isn’t. Or isn’t always the best way.
If you find yourself saying, “I want to perform some custom action when I dial a feature code”, or “Before I route this call to a ring group (or any other GUI destination) I need to perform this custom action.”. In both of these cases, you don’t want to use dialplan hooks, you want a Custom Destination. This week’s #FridayFun is a dive into the Custom Destination feature.
What is a Destination in FreePBX?
Everywhere in the GUI, when setting up call flows, there are fields where the admin sets where the call goes next. When building a call flow, the final field of the dialog is usually where you set the destination, this one:

The admin can select any of the predefined destinations from the destination dropdown menu. If you want to add to this menu with your own destination, that would be a custom destination.
Custom Dialplan
For today’s example, we have a need to send callers thru a few lines of custom dialplan before routing them to a Ring Group. As with most custom dialplan, we start in the file /etc/asterisk/extensions_custom.conf. Those who are new to Linux might find the Config Edit module helpful. From there you can add these lines easily to the appropriate file:
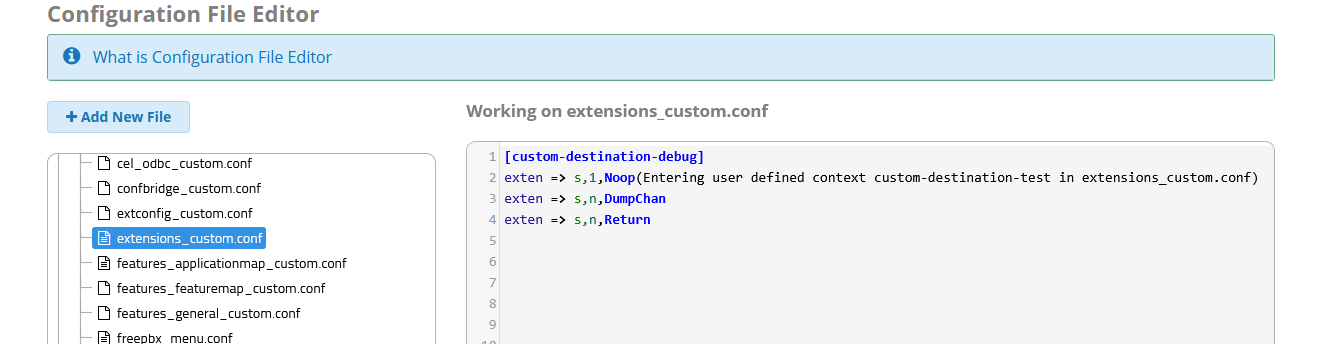
This is the dialplan I’ve added:
[custom-destination-debug]
exten => s,1,Noop(Entering user defined context custom-destination-test in extensions_custom.conf)
exten => s,n,DumpChan
exten => s,n,Return
Just a few simple lines following normal Asterisk diaplan rules. We have the context of custom-destination-debug, we have the exten of s and it starts at priority 1. Saving those lines we can continue to the next part.
Where is it?
Browse to the Admin Menu, and you should see two custom options, Custom Destinations and Custom Extensions:
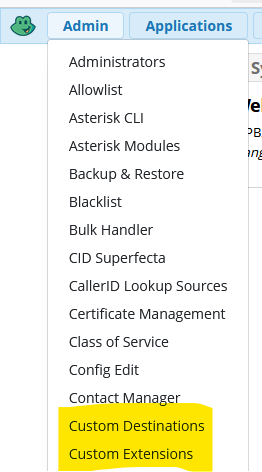
If you don’t see these, use Module Admin to install the Custom Applications module.
What does it do?
Click on Custom Destinations and then the Add Destination button. You will see this dialog
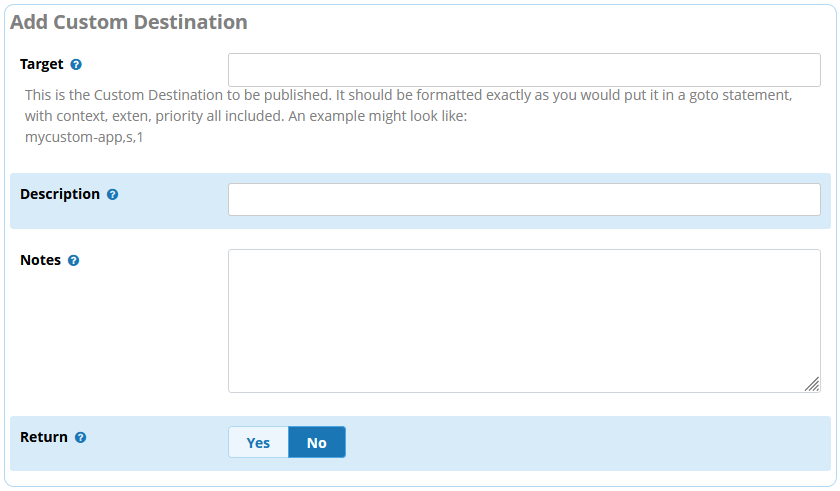
Following the tool tip for Target, it wants a string with context, exten, priority properly formatted for an Asterisk Goto (or GoSub) Application. In our case we’re using the one we just created with the config edit module:
custom-destination-debug,s,1
The description and notes are free form fields for identifying the custom destination.
The Return option is used to indicate to fpbx that your custom dialplan ends with a Return statement. This sets up the internal dialplan to use a GoSub application and allows the admin to choose another destination after the custom destination runs. Filling out the various fields I end up with:
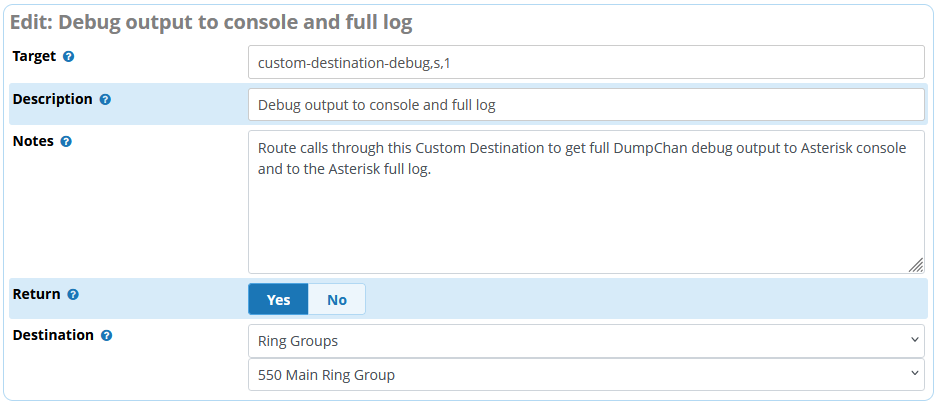
Submit the page.
How Can I use it?
From this point on, there is a new destination available in the dropdown menu when building call flows:

You can select this anywhere in the GUI that will accept a destination. In this example I would probably edit the Inbound Route to send the caller to the Custom Destination, and the Custom Destination sends the call to Ring Group 550, etc.
If you want a dialable feature code, such as might be needed for testing, you can do that with a Misc. Application:
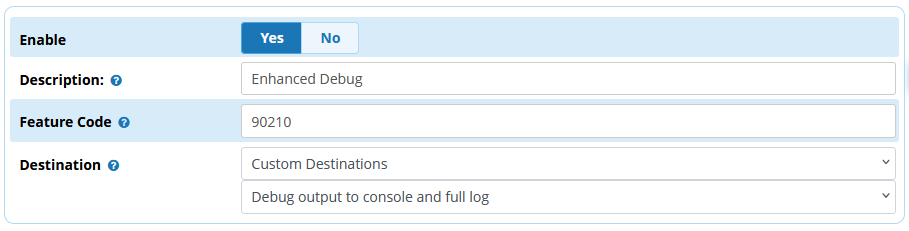
With this Misc App created, and after the Apply config, I can pick up my desk phone and dial the completely random sequence of numbers, 9-0-2-1-0. I see this at the Asterisk console with much removed for clarity:
When the call reaches the part where the Custom Destination is run, we can see the Gosub statement with the target string exactly as we typed it in the GUI
-- Executing [dest-1@customdests:2] Gosub("PJSIP/4002-00000152", "custom-destination-debug,s,1()") in new stack
Then we can see the lines of the custom dialplan exactly as we wrote them in Config Edit:
    -- Executing [s@custom-destination-debug:1] NoOp("PJSIP/4002-00000152", "Entering user defined context custom-destination-test in extensions_custom.conf") in new stack
    -- Executing [s@custom-destination-debug:2] DumpChan("PJSIP/4002-00000152", "") in new stack

Dumping Info For Channel: PJSIP/4002-00000152:
================================================================================
Info:
Name=               PJSIP/4002-00000152
Type=               PJSIP
   * snip *
================================================================================
    -- Executing [s@custom-destination-debug:3] Return("PJSIP/4002-00000152", "") in new stack
The return takes us back to the generated fpbx dialplan:
-- Executing [dest-1@customdests:3] NoOp("PJSIP/4002-00000152", "Returned from Custom Destination Debug output to console and full log") in new stack
And finally to ring group 550 as we configured in the GUI:
-- Executing [dest-1@customdests:4] Goto("PJSIP/4002-00000152", "ext-group,550,1") in new stack
And that’s it. A complete framework to structure a call flow to follow the GUI config, then to custom Asterisk Dialplan, and then back again. I would consider this level of usage to be intermediate, but we still managed to do the entire config within the fpbx GUI, so is entirely accessible to beginners who’ve not managed to find their way to ssh clients and linux text editors.